Compatible with PC versions of ZBrush 2018, 2019 and 2020. Limited functionality in earlier versions.
Help/Initialize
Initialize SoMuchZBrush or get help.
Logo: Pressing on the logo will pop up a menu to get help, contact SoMuchMonsters or see your version # for debug purposes.
Init. Script: Press the first time you open a Zbrush session before you use the script to make sure all your settings are properly accounted for in the UI!
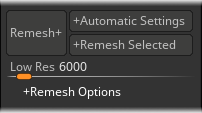
Remesh+
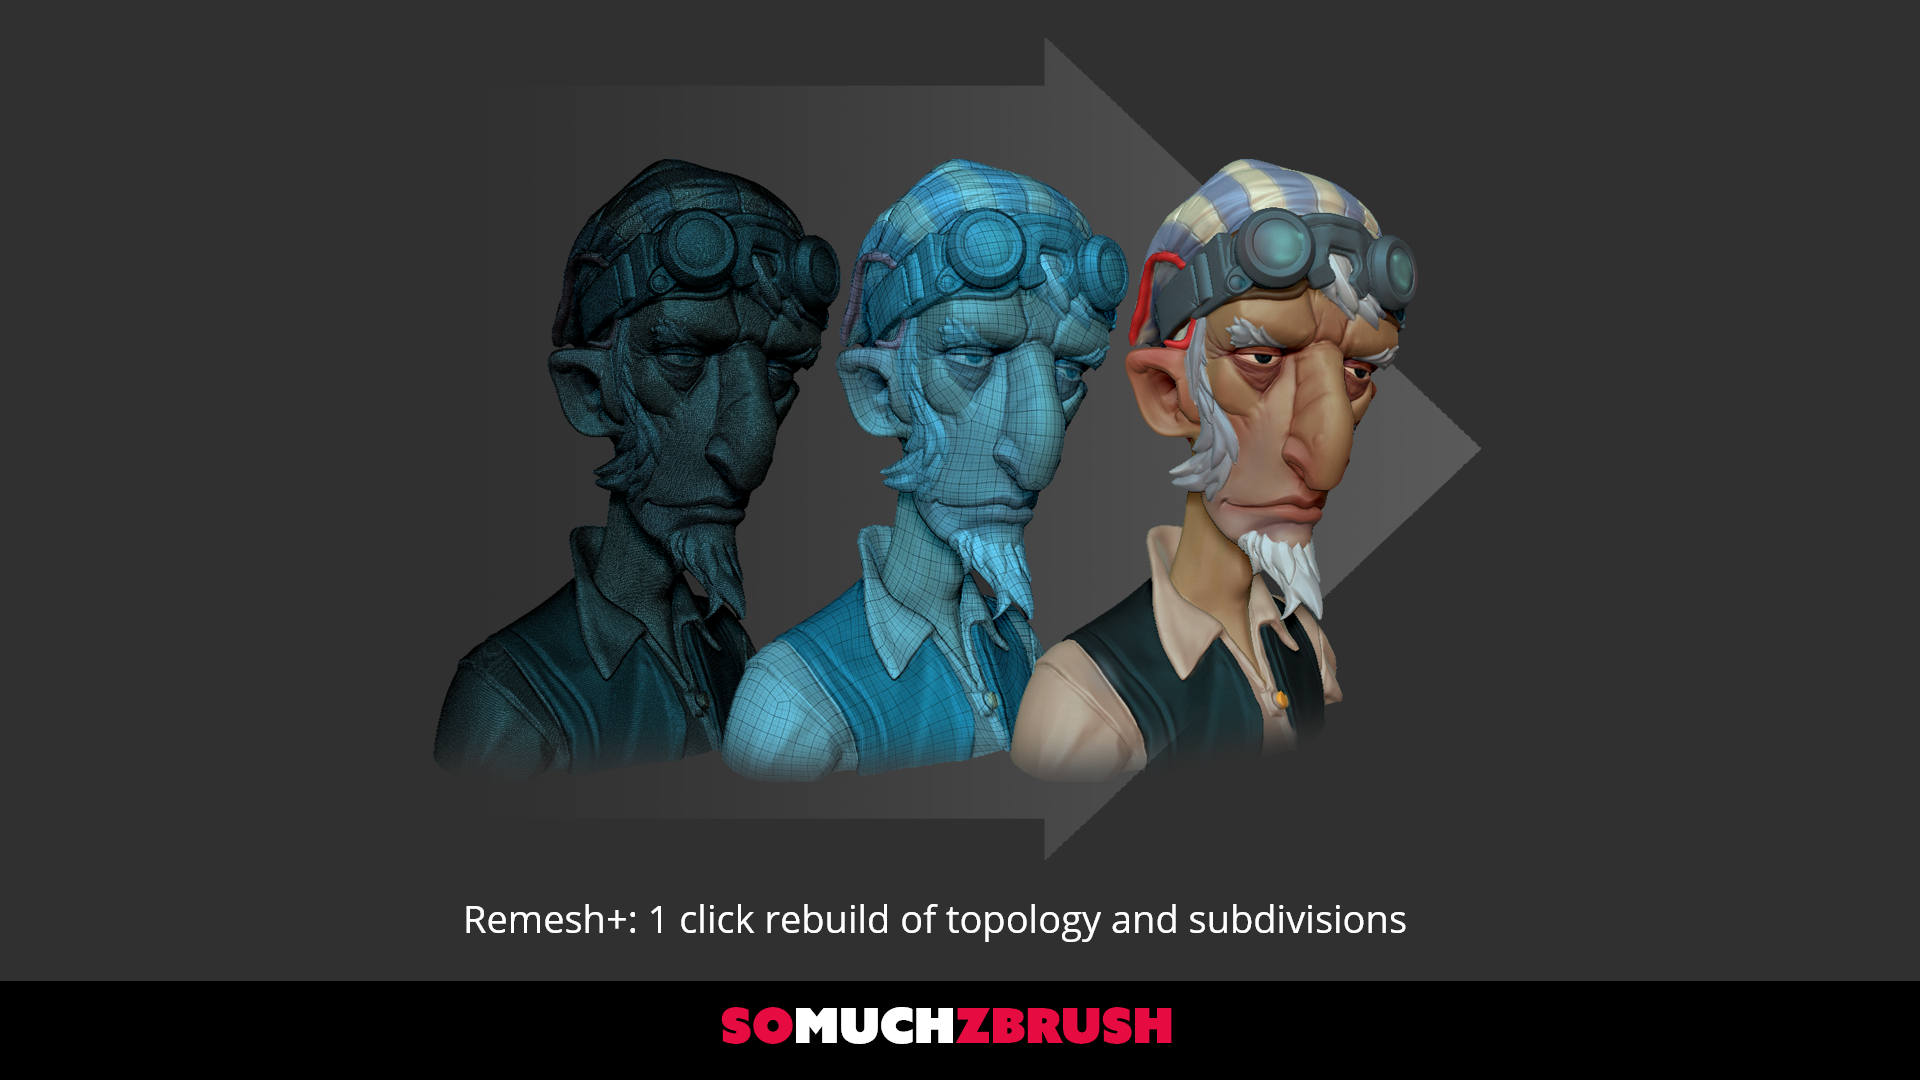
One click remeshing button to save you countless menus scrolls.
+Automatic Settings
This drop down controls whether SoMuchZBrush automatically picks your target high poly count and Subdivisions based on your original models polycount or uses the settings below.
Automatic Settings: Using the resolution of your original mesh and the Low Res slider as a guide, SMZ will determine how many subdivisions your new model should have before doing the reprojection.
Custom Settings: Using the Low Res as a target count, SMZ will use the Remesh Options below this feature to determine the way it will rebuild for you.
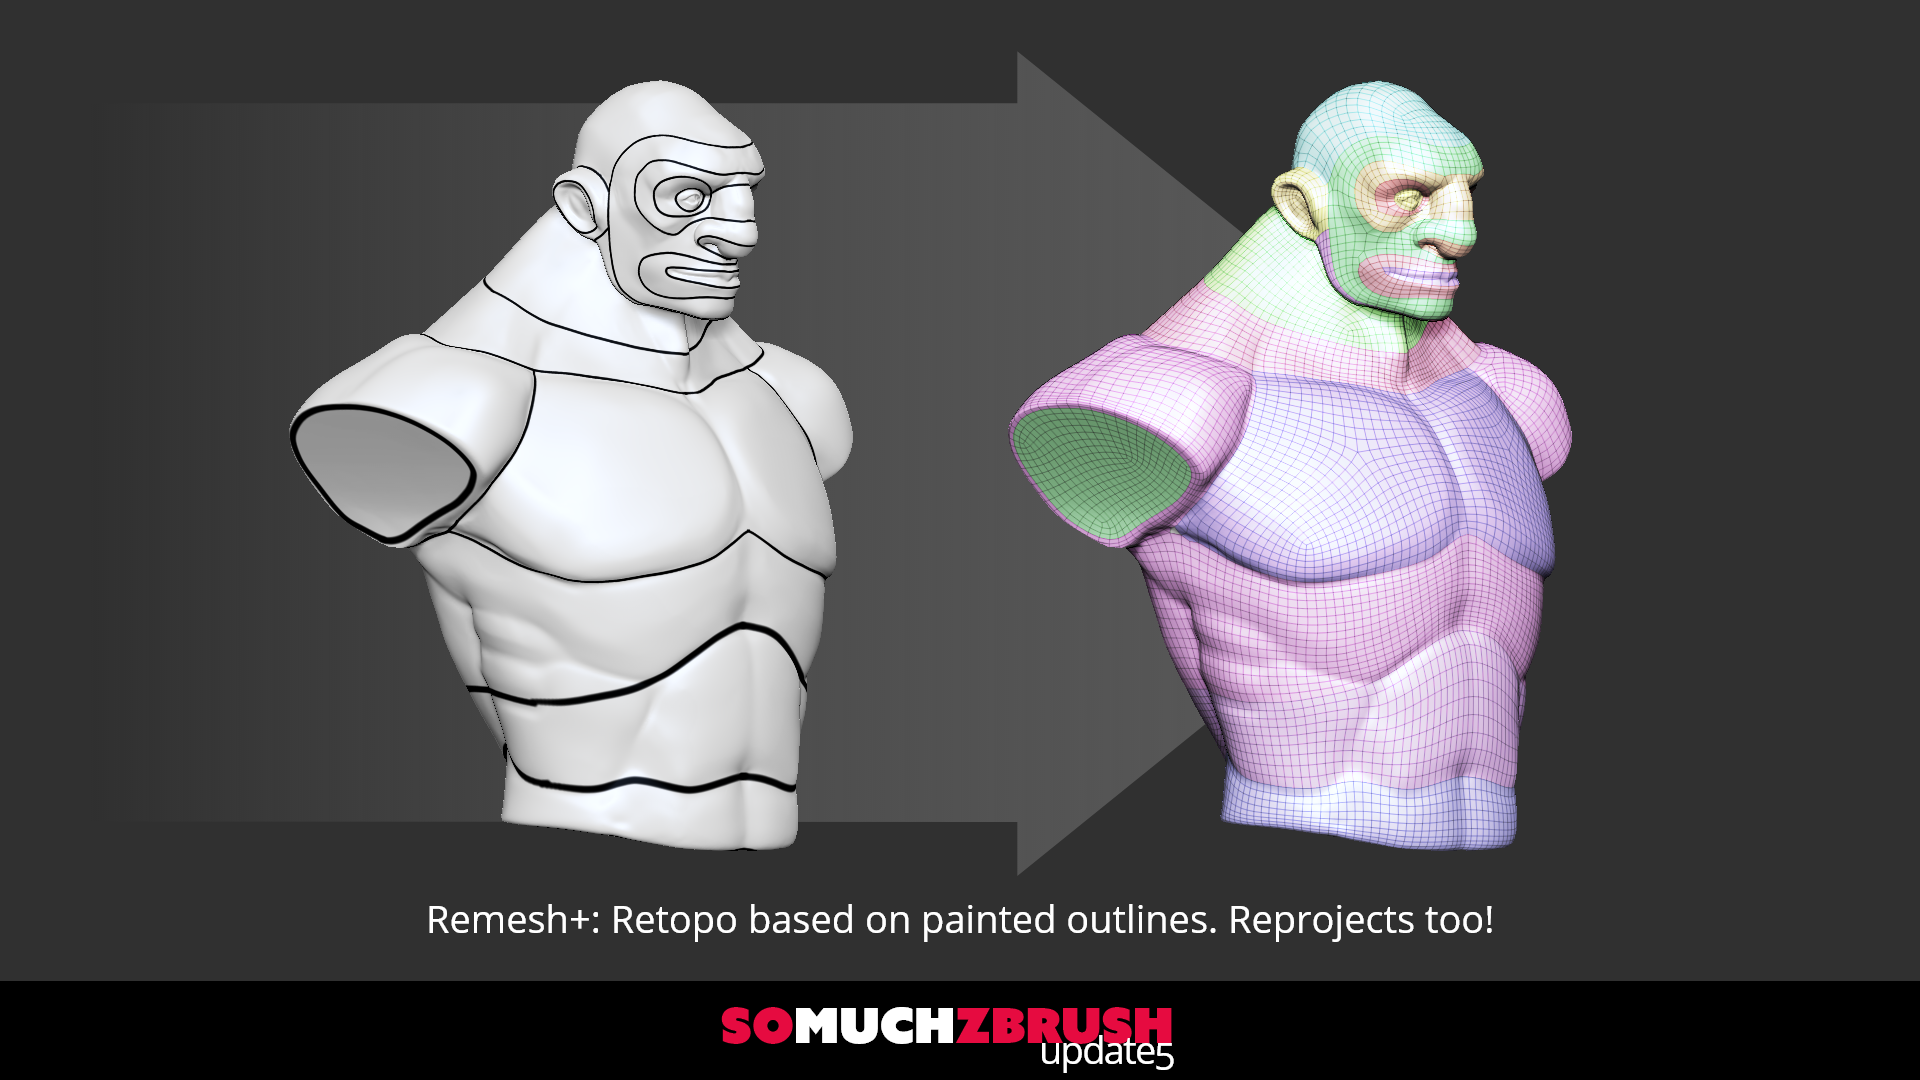
From Outlines: Selecting this option will pop a UI up prompting you to create polygroups from a white model with topology lines painted in black. Hitting Remesh+ will create topology from the new groups and reproject all detail to them.
+Remesh Selected
This drop down controls what Subtools will be rebuilt for you. It has three options:
Remesh Selected: Remesh the currently selected Subtool.
Remesh Visible: Remesh all currently visibile Subtools
Remesh All: Remesh all Subtools in your ZTool regardless of their current visibility.
Low Res: Target resolution for ZRemesh on SubDivision 1. If you are using Automatic settings and remesh all, this is considered the base resolution for the whole character. Each Subtool will take a percentage of this value. Basically, a gauntlet versus a whole body, you should not use the same resolution—so lets not.
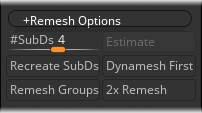
Remesh Options
Options that affect how your Remesh+ is constructed.
#SubDs: This setting tells you how many times to subdivide your new low res.
Estimate: Shows and approximate final high res polycount after recreating subdivisions. Also used as a check when subdividing.
Recreate SubDs: Turning this switch on will duplicate your model, zremesh, subdivide up to your max count, store a morph, and then reproject your detail. 10 less scrolls through the menu to do what you do on every mesh!
Dynamesh First: Enabling this switch will do a dynamesh before doing ZRemesh and reprojecting. Super helpful if you are making very low poly meshes from many elements.
Remesh Groups: Enabling this switch will have ZRemesh keep your polygroups.
2x Remesh: Remeshes once with full group smoothing followed by a second ZRemesh without it resulting in a substantially cleaner(but less detailed) low poly.
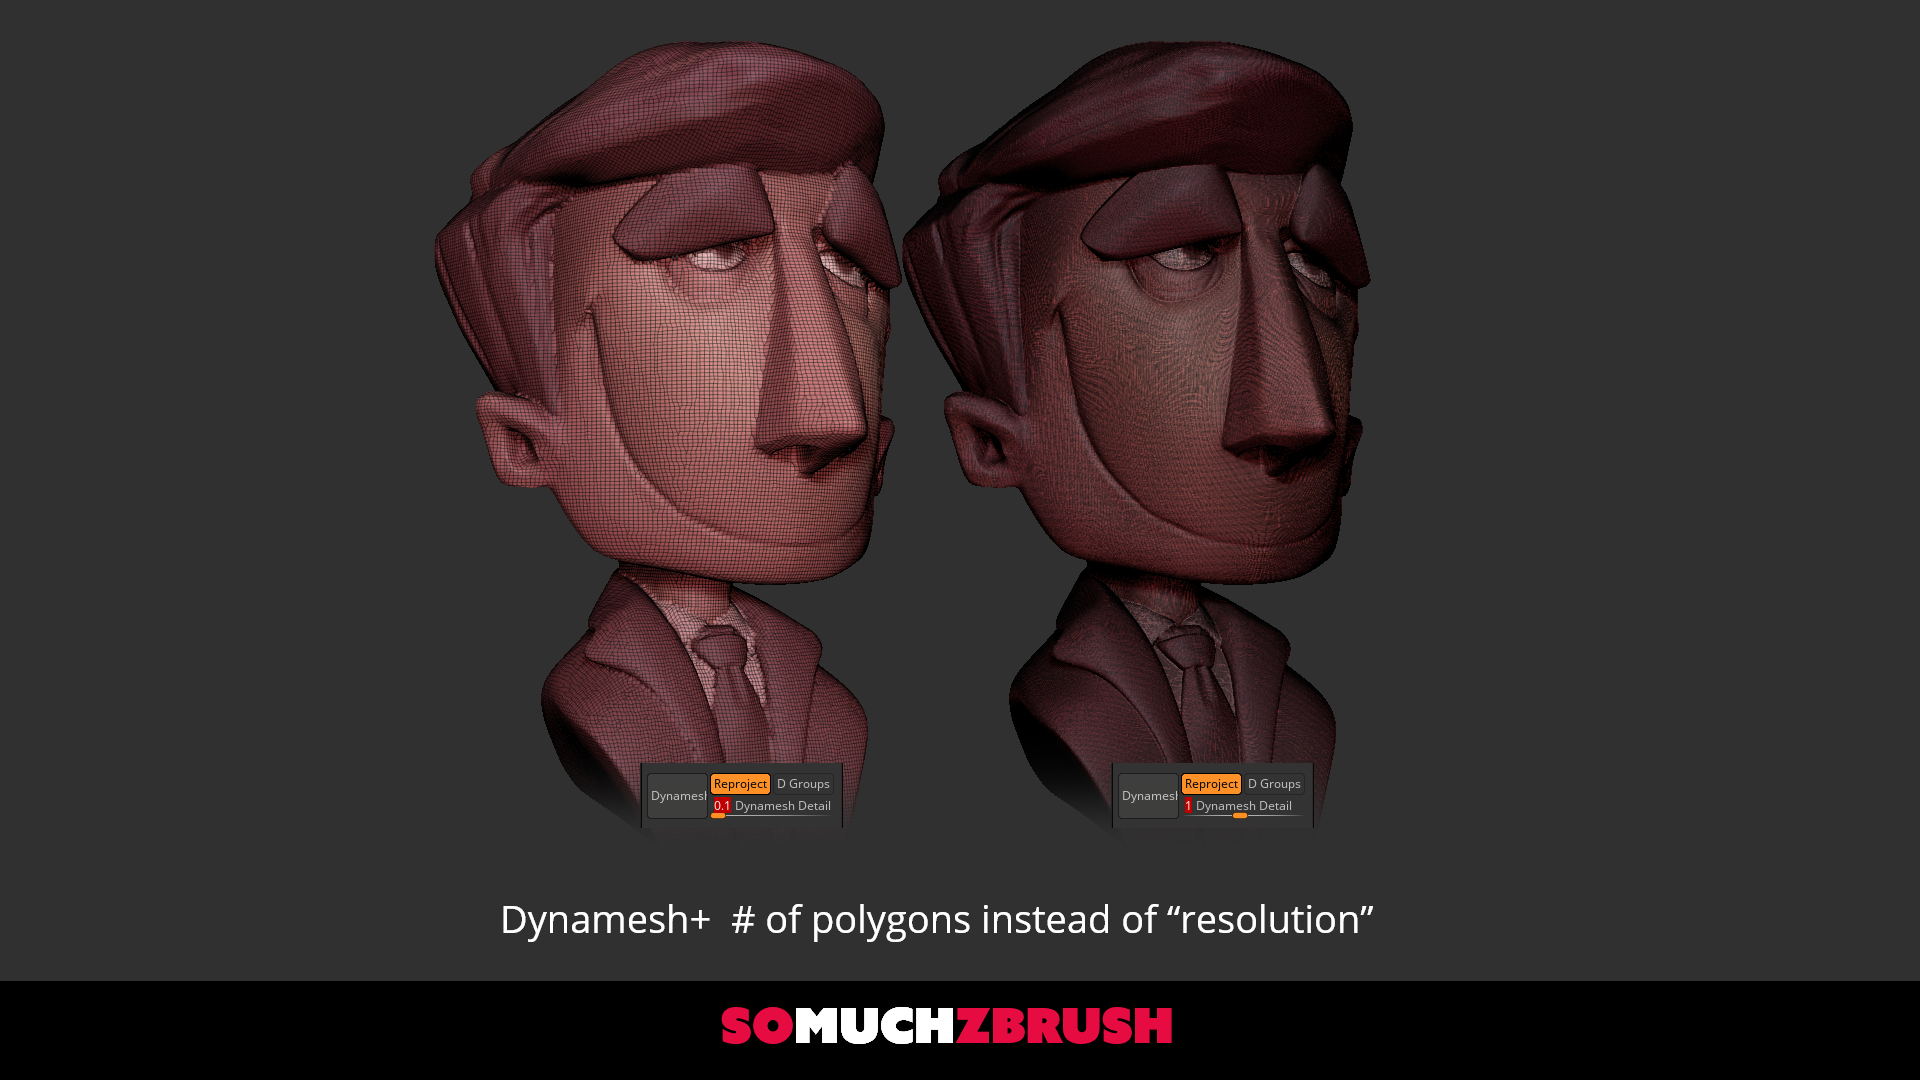
Dynamesh+
Dynamesh in number of polygons instead of “resolution.”
Reproject: Turns on reproject for dynamesh.
D Groups: Dynameshes polygroups individually.
Polygons: Sets dynamesh polycount in millions of polygons
Mirror+
Visually pick which side of your model to Mirror Paint or mirror geometry.
+Mirror Paint: This drop down selects between Mirroring only your paint, or mirroring geometry.
+Do Not Rebuild: This drop down controls whether you will get a rebuild low res and reprojection.
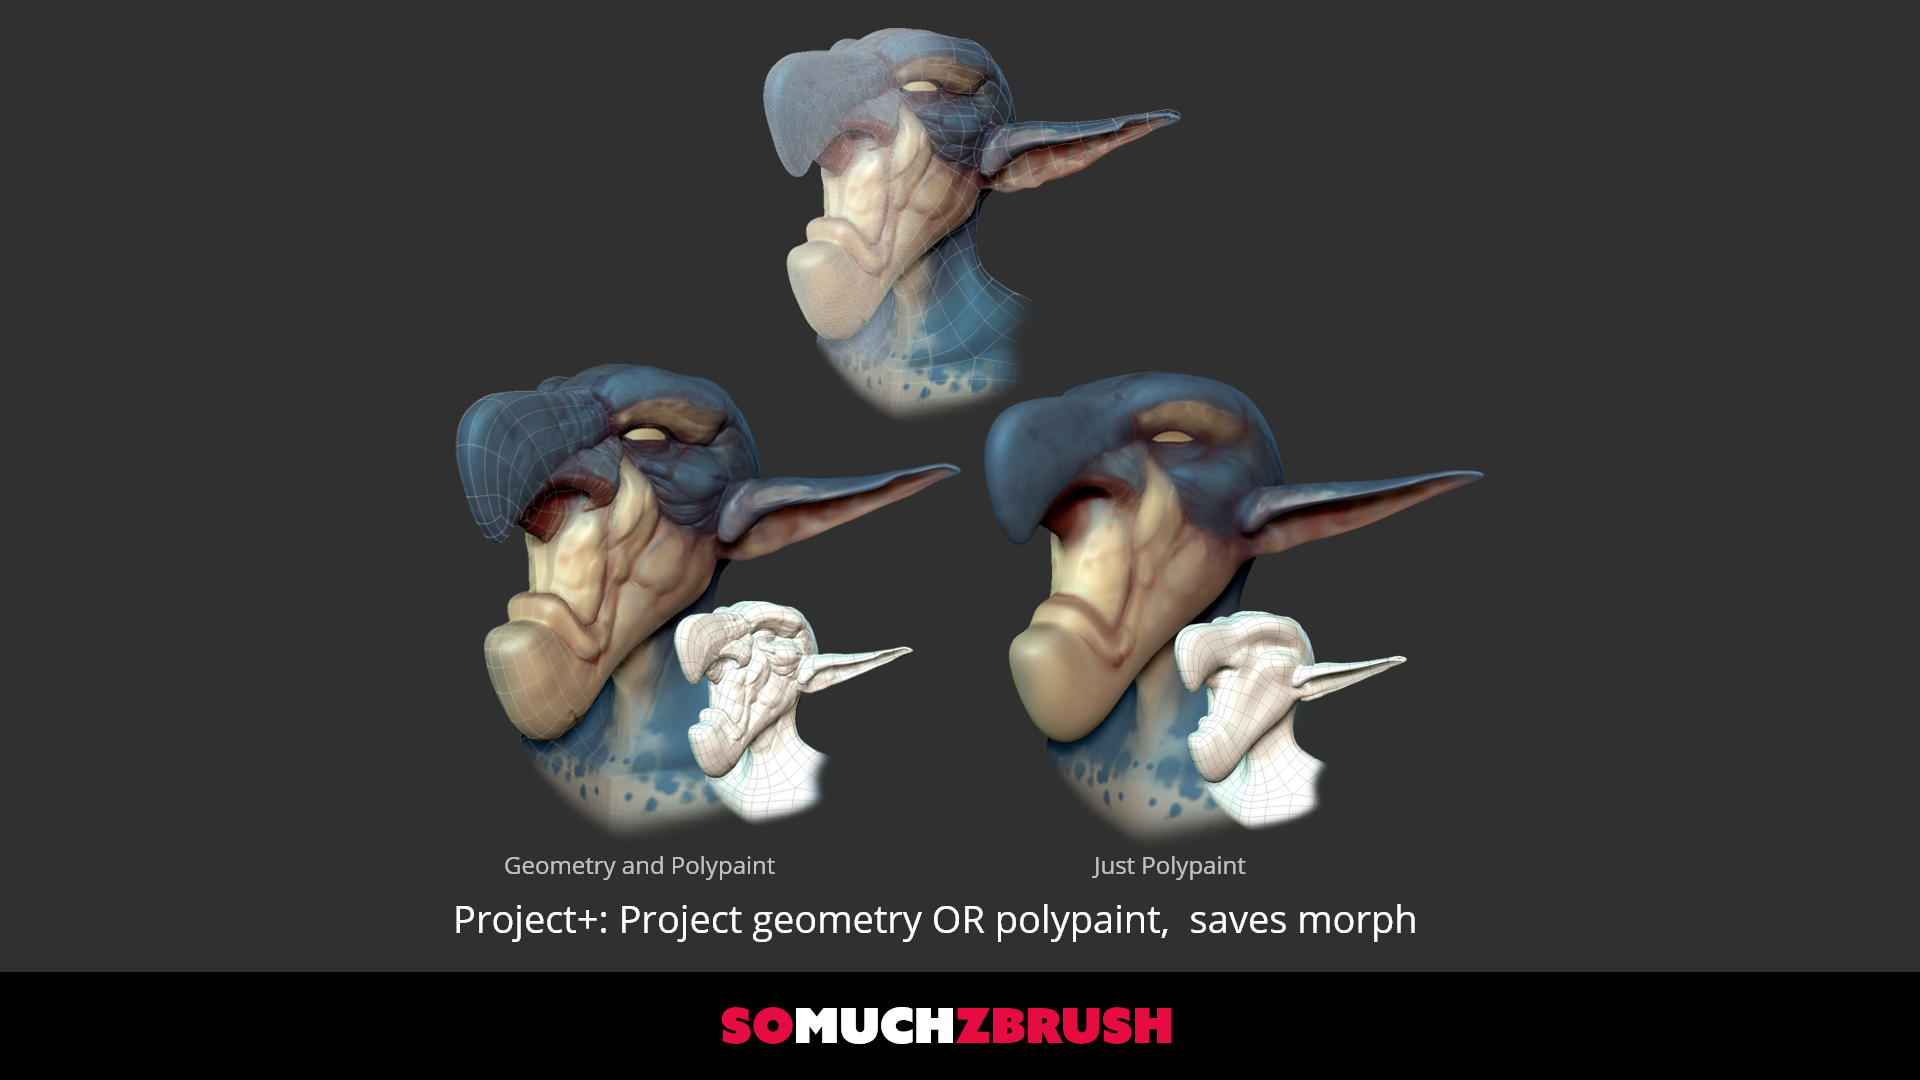
Project+
Project current scene to current subtool.
Save Morph: Stores a morph target before doing the project. Try the morph brush after project with this on to clean up bad projections.
Poly Paint Only: Projects as normal, but only keeps the poly paint!
ProtoMesh
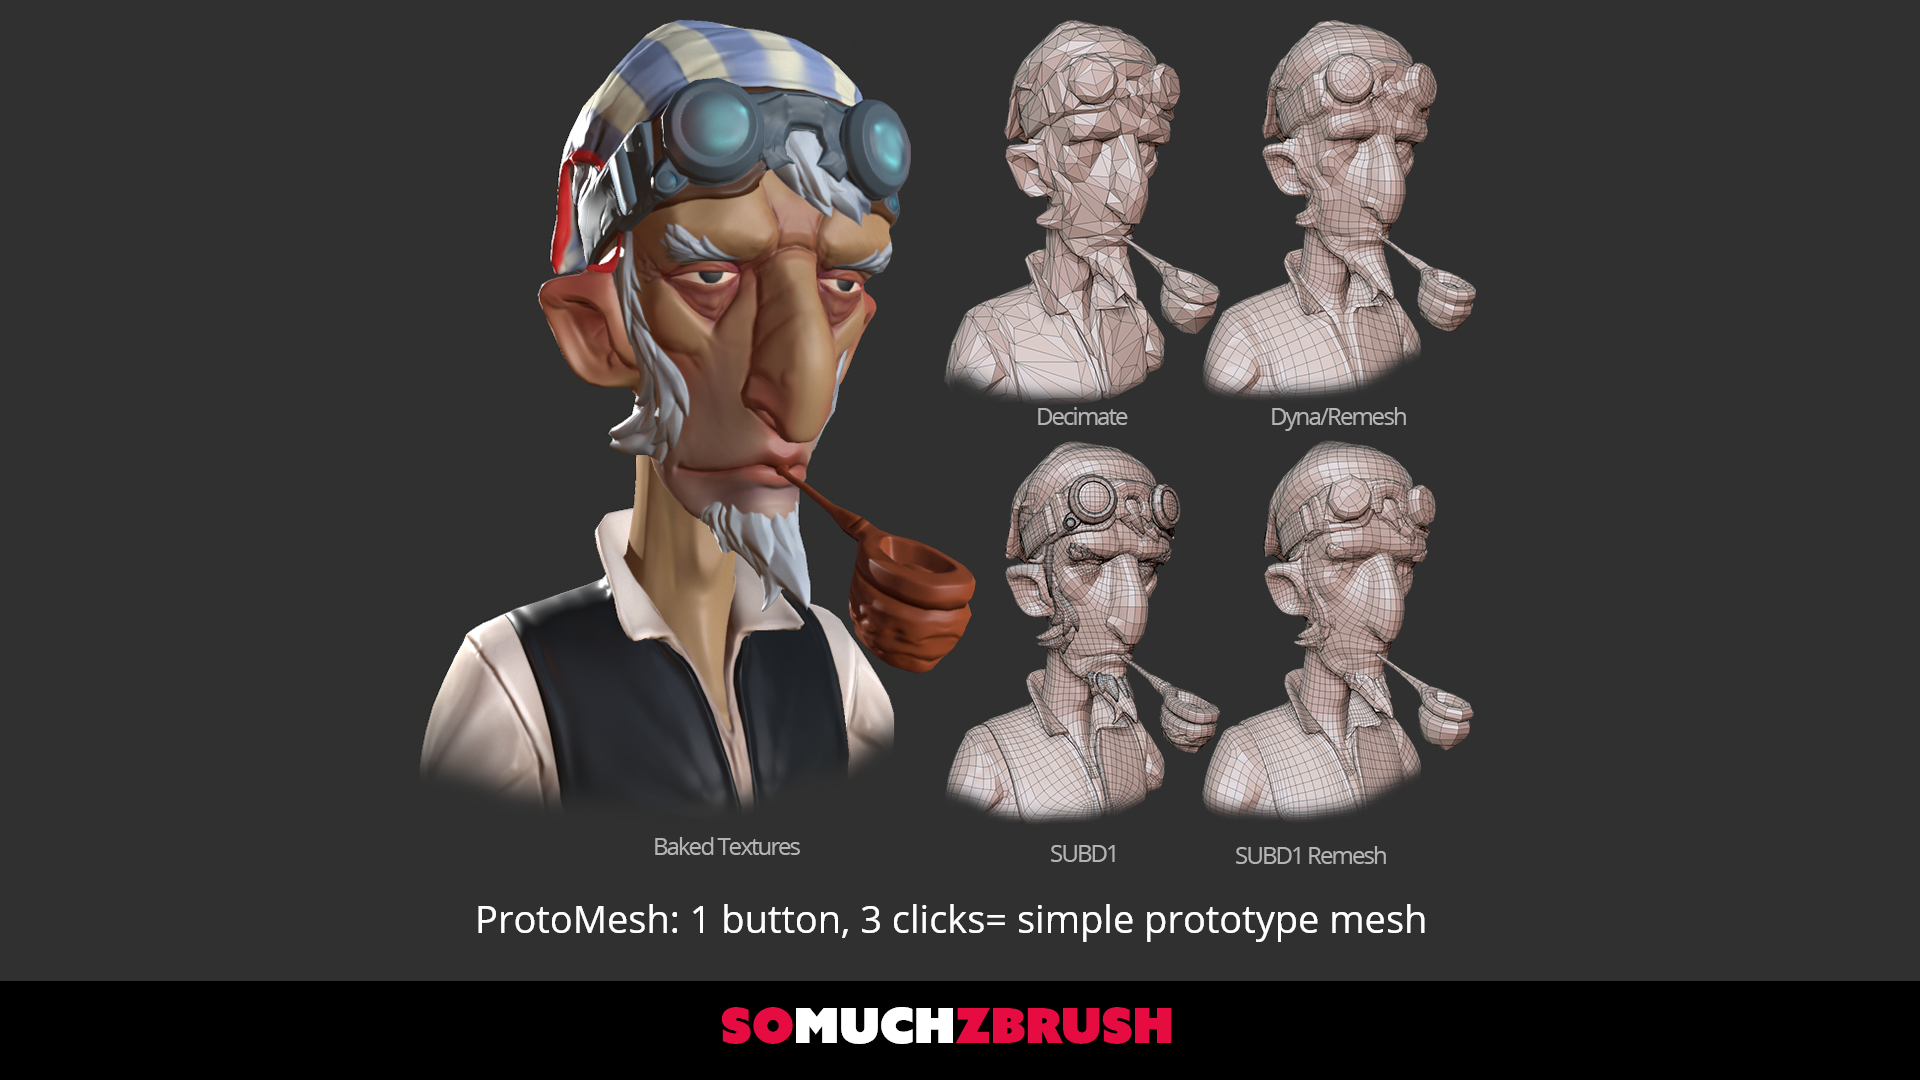
One button, 3 clicks= simple prototype mesh to check out in game. Each press will set
*Select Type:
Selects the method in which the low poly is generated.
Dynamesh/Remesh: Combines all your visible meshes, dynameshes to make them as contiguos as possible, then uses Zremesh to create a simplified geometry with cleaner edge loops. Great for models that are simple and dont have a lot of holes in the mesh.
Decimation: Combines all your visible meshes, dynameshes to make them as contiguos as possible, then uses Decimation to make a simple low poly mesh. Works best to get a solid approximation of a a very low poly mesh(I.E. DOTA 2 assets.)
SUBD1: Uses your lowest subdivision on every visible subtool and combines them. Works best if you dilligently block things out.
SUBD1 Remesh: Uses your lowest subdivision on every visible subtool and combines them but Zremeshes at this resolution. Works best with things like Marvelous designer meshes.
Select Lowres: Allows you to select an arbitrary lowpoly mesh and use it instead of processing your high res. This feature will only unwrap your model if there are no UVs.
Reset Proto: Resets the state of the Protomesh button to default state. Use this if you are switching projects or want to start fresh.
Pick Low: Used when you are using "Select Lowres" mode. Import your low res model, select it and then hit this button to store a reference to it for export.
Low Poly Count: This slider controls the resolution of your generate low poly mesh. Not used if you select SUBD1 as your low poly type.
ProtoPrep Options
Setup your ProtoPrep and the options for baking.
1 Merge: This merges your visible high poly mesh, creates a low poly model based on the type you've selected and does some preparation for UV mapping. This is a one off alternative to the Protoprep state of the main button.
2 Unwrap: This button will take your current polygroups and does its best to turn them to UV islands on your low resolution mesh. If you have a symmetrical low poly and have Proto Sym selected, it will also make the UVS mirrored.
3 Export: This button will export your mesh and set it up in your chosen editor.
Update High: Once you've exported your model, you can use this to simply update your high res and Substance will automatically rebake. Currently, this will only work with Substance. If you want to rebake in Marmoset you will have to hit export again.
Proj.Folder: Sets the path your OBJs will export to. If you have Marmoset enabled, it will also generate your PSDs in this folder.
TB3 Folder: Sets the path to Marmoset Toolbag 3. Required to bake textures automatically!
SP Folder: Sets the path to Marmoset Toolbag 3. Required to bake textures automatically!
Renderer: Select what application you’d like to use to bake your textures.
Viewer: Select the final destination of your model after baking.
Tex Res: Sets the resolution of your texture bakes in Marmoset Toolbag 3
SP Template: If you are using Substance Painter, this will set up your file once it is baked with the correct textureset settings, shader and export settings.
Blockout+
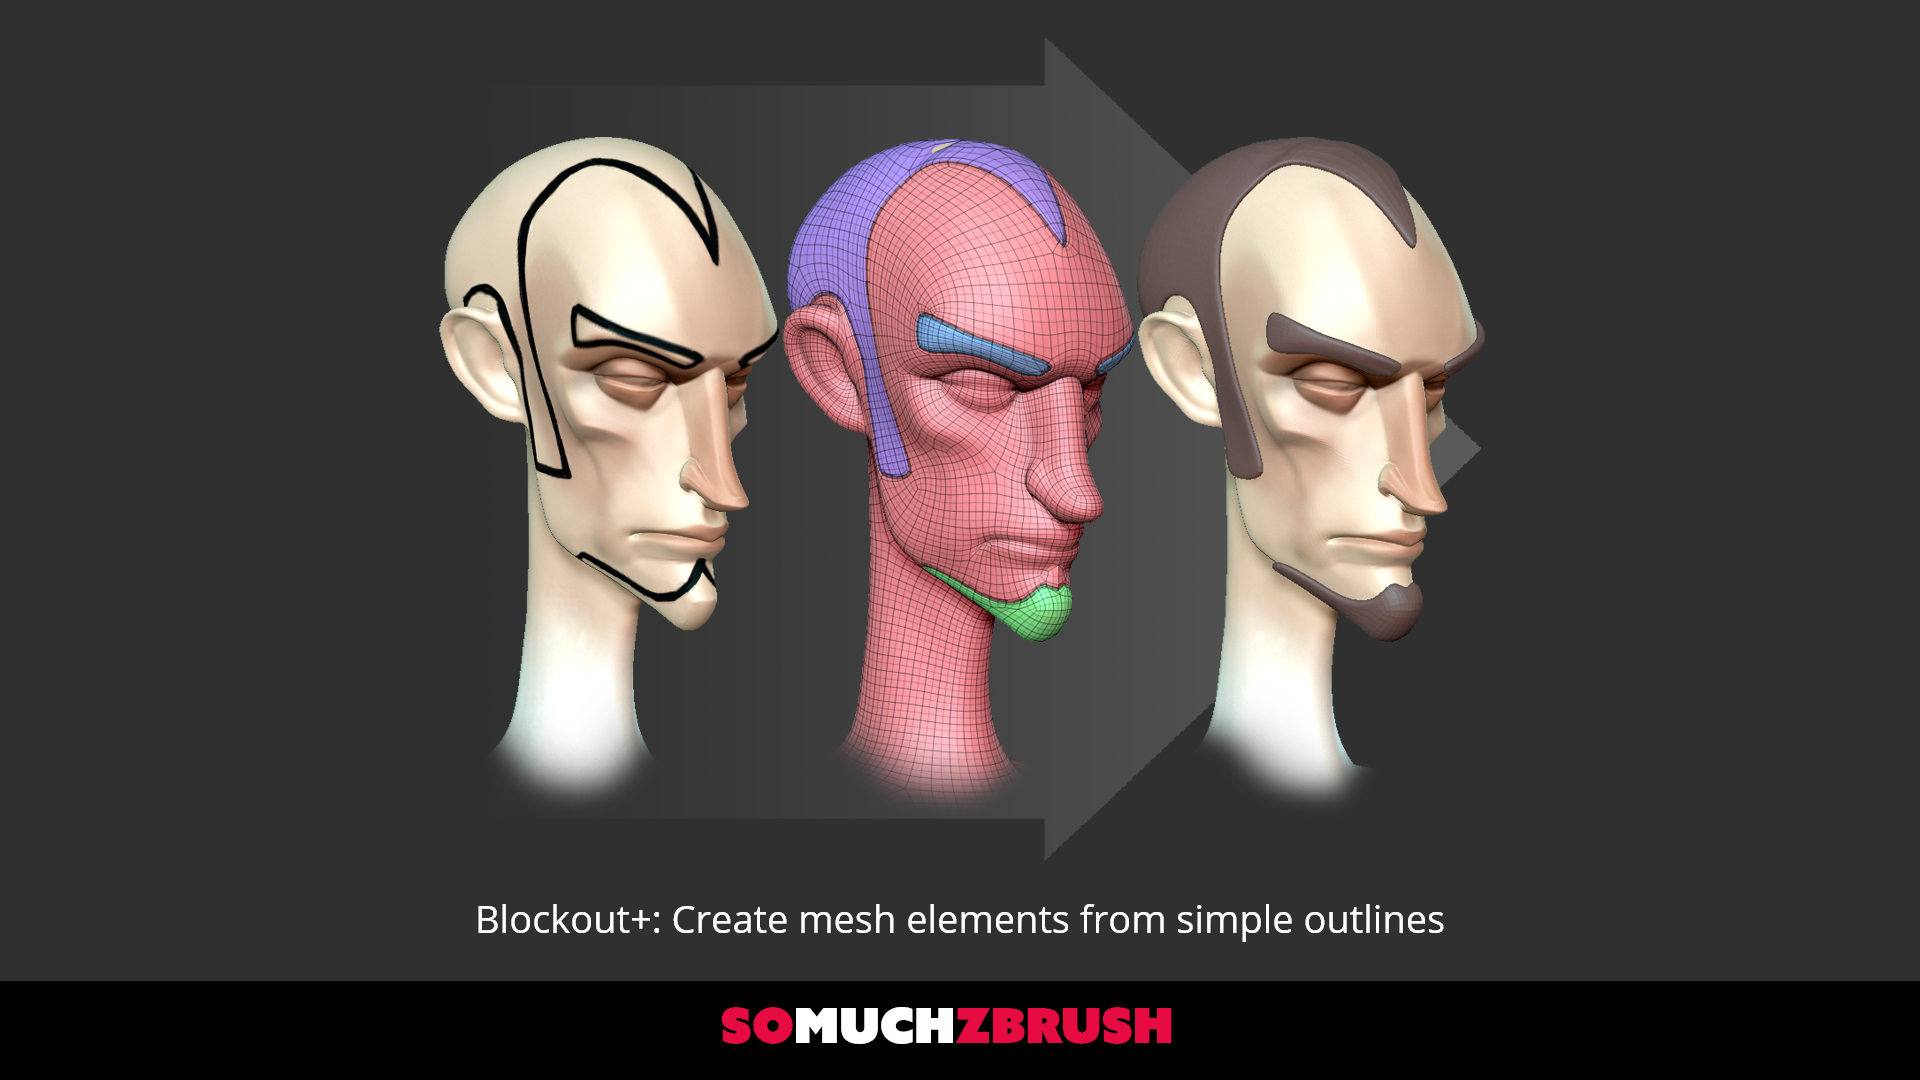
Quickly split a single mesh into multiple meshes with a bevel shape and thickness!
Setup Groups: A quick button to delete subdivisions and run PolyGroupIt by paint. This will split your mesh up into individual polygroups!
Bevel Shape Profile Dropdown
Sets up the shape of your extrusions.
Diamond: 90 Angled profile for bevel shape.
Round: Rounded profile for bevel shape.
Square: Squared off profile for bevel shape.
Height Dropdown
Sets up extrusion settings relative to your original mesh.
Above: Places the extruded geometry above the surface of the source mesh.
Center: Places the extruded geometry centered on the source mesh.
Below: places the extruded geometry below the surface of the source mesh.
Panel Thickness: Thickness of the created panel loops.
Blockout Options
P Loop It: Run Panel Loops with the same settings that Blockout+ would, but dont do any of the extrusion stuff.
Polish: A little science to clean up your edge loops before you add thickness. Super useful if cleanliness is your goal.x
LoopHR: Primarily for hard surface use, this button will add a couple subdivisions before adding your panel loops making it relatively high density. Will result in cleaner planes.
Unwrap+
Auto unwrap with useful tricks.
Unwrap: Fixes mesh errors, then unwraps your mesh from polygroups. If your mesh is symmetrical and you have symmetry on it will respect it.
Flatten: Flattens your current mesh into a UV plane. While in this mode, you can assign new polygroups--when you unflatten, it will ask you if you would like to re-unwrap.
UV Depth: Changes the UV Depth when in Unwrap Mode. This feature is only supported in ZBrush 2020.
UV Tools
Tools to help cleanup UVs quickly!
Grow Shrink: Grows then shrinks your visible polygroups to quickly fill holes in polygroups.
G/S Increment: Sets the number of times your Grow Shrink increases and decreases visible mesh.
<, <<: The arrows on the left side decrease your visibile polygons. < is a single press, << is a double press.
>>, >: The arrows on the right side increase your visibile polygons. < is a single press, << is a double press.
Group Visible: Just what it says! Groups visible polygons.
Grp Front: Uses polygons that are facing the camera, sets tolerance.
Grp UVs: Groups unique UV islands into a single polygroup. This is useful after you've auto-unwrapped to help clean up groups.
Merge Strays: Will merge groups with a single polygon into the largest area neighbor polygroup.
Utility Tools
Useful extra tools that can speed up your workflow
SymExtract: Extracts a mesh to your current extraction depth, turns on symmetry, selects the new mesh. No confirm dialog.
GroupSym: Autogroups your mesh and groups symmetrical meshes. No more manual grouping for symmetry!
Divide2Max: Divides your mesh up to but not over your maximum polycount set below. Also retains open edges! ayyyy
ALL2MAX: Does the same procedure as Divide2Max but on all subtools!
MergeVis: New button to merge all visible subtools and automatically select the created subtool.
Settings
Script global options to help keep you safe.
Max Res: Sets a high res maximum for a few functions inside of SoMuchZBrush. This is not a hard limit but instead a safety feature for subdivide functions.
Remesh Tolerance: Sets a tolerance for the limiter when determining number of subdivisions. High values will let SoMuchZBrush get another subdivision if it normally would stop.

